The short answer
Add LR to Photos in Lightroom Classic’s Plug-in Manager, connect Photos, create a published collection and click Publish. Start with three photos so you can check the destination before sending a larger batch.
Before you begin
You need a Mac, Lightroom Classic, Apple Photos and your LR to Photos download. This is a Classic plugin; it does not run in the cloud-based Lightroom app, on iPad or on Windows. Our published tested baseline is macOS Sequoia with Lightroom Classic 14. macOS Tahoe and Lightroom Classic 15 are expected to work. Contact support if you need help with your setup.
Use your existing catalogue and intended Photos library. You do not need a new Apple Account or a new Lightroom catalogue. Keep your normal backups current.
1. Install the plugin
- Download your purchase and unzip it.
- Move the lrtophotos.lrplugin folder to a permanent location on your Mac. Keep it there after installation.
- In Lightroom Classic, choose File → Plug-in Manager, click Add, then select that folder.
- Check that LR to Photos is enabled and running, then click Done.
If it is missing from the list, check that you selected the extracted .lrplugin folder, rather than the ZIP or its parent folder.
Already purchased? Update to version 1.3.1
This update is included for existing 1.x customers. Open View content in your original Gumroad receipt, or open LR to Photos in your Gumroad Library. Download LR-to-Photos-1.3.1.zip and unzip it. You do not need to buy again.
- In File → Plug-in Manager, check the location of your current plugin.
- Quit Lightroom completely and back up the old lrtophotos.lrplugin folder.
- Replace that folder with the new lrtophotos.lrplugin folder in the same location.
- Reopen Lightroom and confirm version 1.3.1 in Plug-in Manager. A full restart loads the new files.
Keep your existing publish service. Updating preserves its collections and settings. When upgrading from before 1.3.0, previously published photos may import one replacement on their first actual republish after upgrading while their saved fingerprints are updated. Updating itself does not republish anything or clean up old duplicates. The optional Out of date album gathers replaced copies for review.
What changed in 1.3.1?
This update improves large imports and handling when Photos rejects files or returns no items. Older copies are marked out of date only after their replacement is confirmed, and confirmed results are retained if a later unexpected error occurs.
If Photos has been returning import errors, quit and reopen it before trying one small failed collection. Check the destination for partial imports first. Keep your existing catalogue, library and originals.
JPEG and MP4 publishing were tested. Not every RAW/DNG variant has been verified: check a small sample in Photos using your intended export format before a large migration.
2. Prepare Apple Photos
Open the Photos library you want to receive the images. In Photos → Settings → General, enable Copy items to the Photos library. The plugin removes its temporary export files afterwards, so Photos needs its own copies. Apple explains copied and referenced files.
For iPhone or iPad access, use your existing System Photo Library with iCloud Photos enabled. A local secondary library will not sync that way. Do not change your System Photo Library just to install the plugin: enabling iCloud on a different library can merge its contents with your existing iCloud library. See the iPhone setup guide.
3. Connect the publish service
- Open Lightroom Classic’s Library module. In the left sidebar, expand Publish Services.
- Beside LR to Photos, click Set Up….
- Choose your export settings. JPEG and sRGB are a straightforward starting point for everyday sharing; choose image size and quality for your needs.
- Scroll to the LR to Photos section. Click Test Connection to Photos.
- Allow Lightroom Classic to control Photos if macOS asks. Confirm the connection test succeeds.
4. Choose the destination
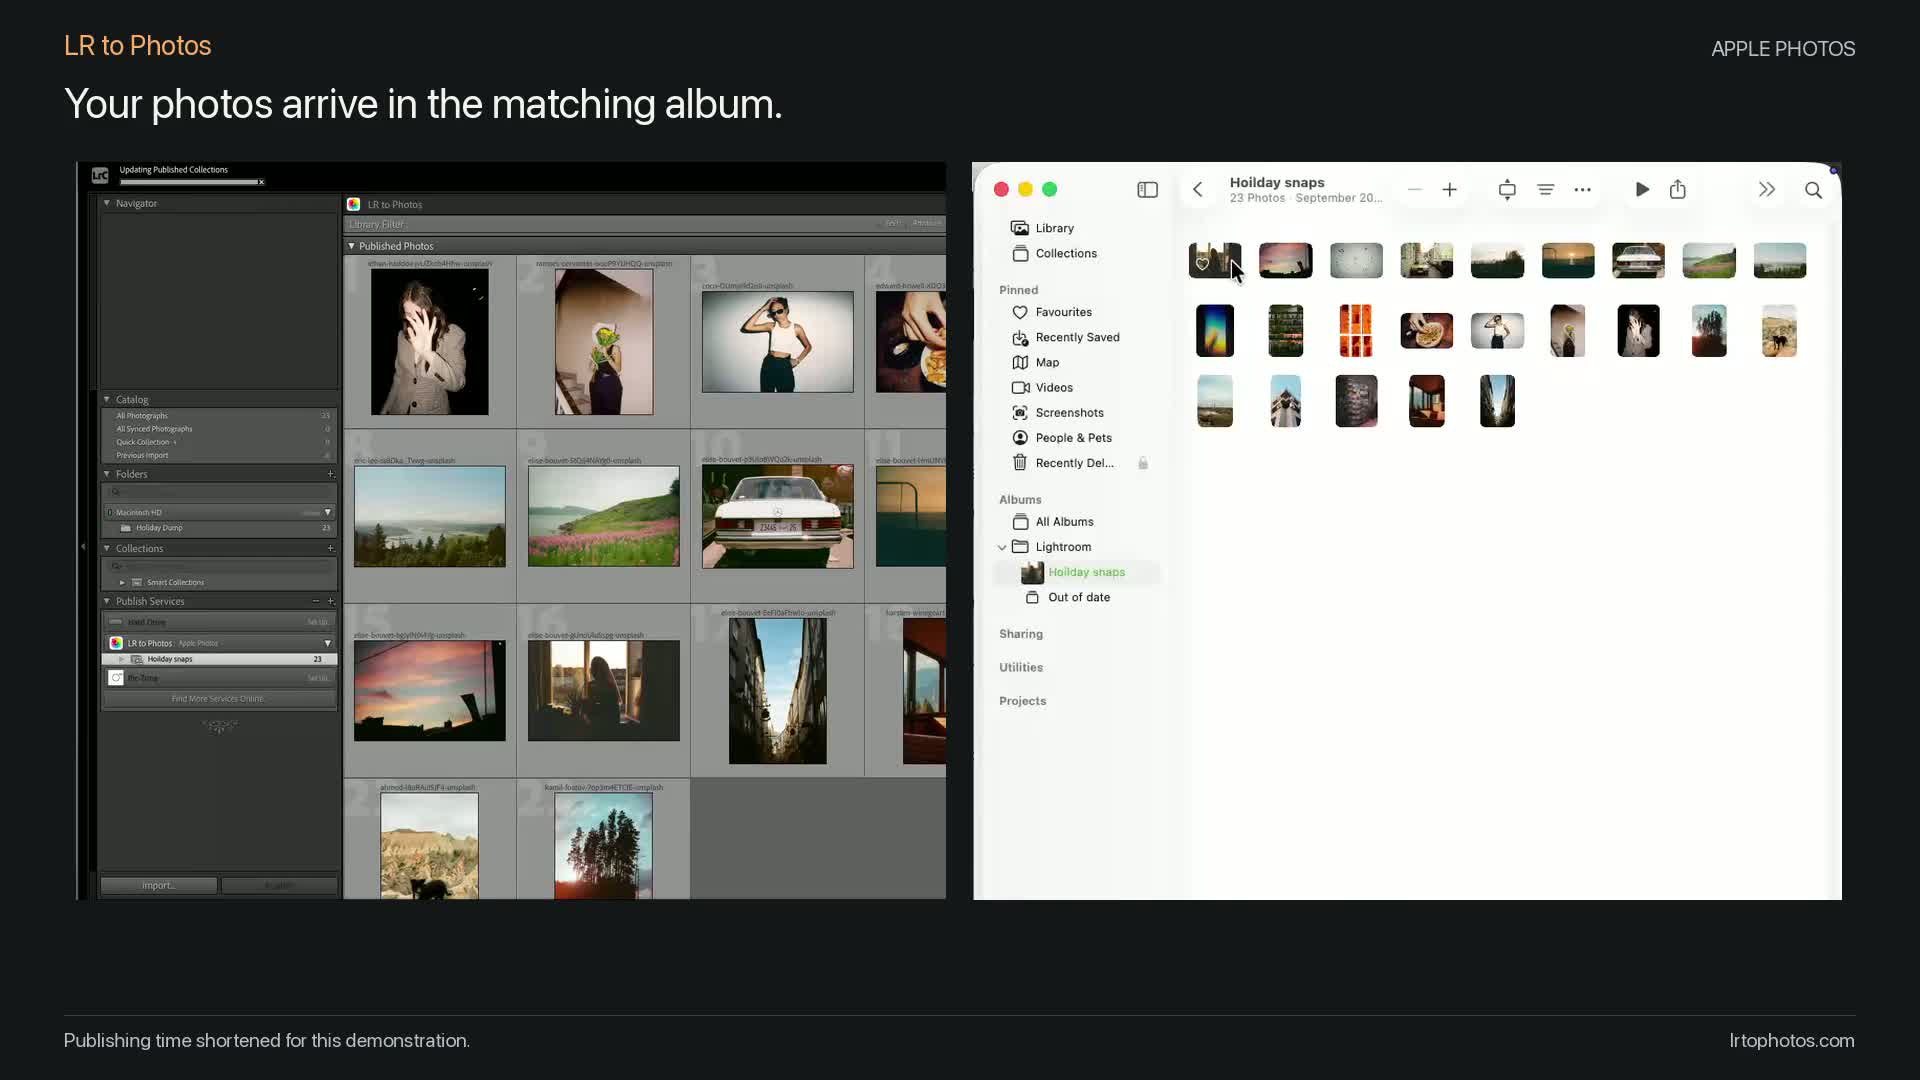
Leave Use Album enabled. Choose Use collection name as album for a matching album per published collection, or Use one album for all collections for a shared destination.
To group albums, enter a Root Folder for Albums. For example, /Travel/2026 with a collection named Italy creates an Italy album inside Travel → 2026 in Photos. A full album path starts with / and has no trailing /. If the album name itself starts with /, it overrides the root folder. Check the destination preview before saving.
For bulk import in version 1.3.0, choose Use collection name as album. The import command preserves the hierarchy beneath your selected folders or collection sets in Photos. Lightroom shows the generated published collections as a flat list with paths in their names. Leave Skip photos whose content hasn’t changed and Collect replaced photos in album enabled for the first test. The default older-version destination is /LR Photos/Out of date. Organisational keywords are optional. Click Save.
5. Publish three photos
- Control-click the LR to Photos service and choose Create Published Collection…. Give it a clear album name.
- Drag three finished photos into that collection. An ordinary collection elsewhere in Lightroom is not a published collection.
- Select the published collection and click Publish. Alternatively, Control-click it and choose Publish Now.
- Wait for publishing to finish. Control-click the collection and choose Show album in Apple Photos.
Expected result: the three rendered edits appear in the destination album. Lightroom’s source files stay where they were. Check the images before publishing more.
Import existing folders and collections in bulk — new in 1.3.0
You do not need to convert folders to collections or rebuild each album by hand. Lightroom does not support dragging a whole ordinary collection onto a published collection. Use the new import command instead:
- In the LR to Photos publish settings, enable Use Album and choose Use collection name as album.
- In the Library sidebar, select the parent folder, collection or collection set you want to publish.
- Choose Library → Plug-in Extras → LR to Photos: Import Existing Folders and Collections.
- Select your publish service. Use the selected sources, or choose All Lightroom folders or All Lightroom collections. Enable Include subfolders and nested collection sets when required.
- Click Preview and check the album paths and photo counts.
- Click Create / Update Collections, then click Publish to transfer their photos to Apple Photos.
A collection set Family → 2025 → Holiday becomes a Holiday album inside Family → 2025 in Photos. In Lightroom, generated published collections stay in a flat list, with paths such as Family/2025/Holiday in their names. Select a higher-level parent if you want its name included. A parent folder with its own photos gets a Photos in this folder album; empty sources are skipped.
Adding more photos later
Choose Library → Plug-in Extras → LR to Photos: Refresh from Source, preview the additions, add the new photos, then click Publish. Repeat the Import command to include newly created folders or collections. Repeated imports reuse linked published collections.
Refresh is manual and additive. It adds newly included photos; it does not remove photos, synchronise album renames or continuously watch sources. Smart collections are imported as snapshots: refresh adds new matches and keeps previous members. Renamed source collections retain their published album names. If a source folder is moved or renamed, refresh reports it as missing; re-import it and check the new destination.
Version 1.3.0 also improves JPEG duplicate checking by ignoring changing export timestamps and internal document IDs. Other formats retain their previous behaviour. See the update note above before republishing older photos.
Collect five-star photos with a rule
Control-click the service and choose Create Published Smart Collection…. Add a rating rule for five stars; add a keyword rule if you want a narrower selection. Check the matching photos, then click Publish.
The rule updates the Lightroom selection. Publishing is still manual. The destination is a regular Photos album, not an Apple Photos Smart Album. Removing a match or removing a photo from Lightroom’s published collection does not delete its Photos copy.
Publish later edits and review older copies
After editing a previously published photo in Lightroom, publish it again. A changed export becomes a new Photos item. With collection of replaced photos enabled, the previous item is also added to Out of date; it remains in your library and may remain in other albums.
Review the new version before deleting anything. In a normal Photos album, Delete only removes album membership; Command-Delete deletes the library item. iCloud Photos propagates library deletions to your other devices. See Apple’s Photos shortcuts.
Metadata-only changes, such as keywords, do not automatically trigger republishing in this plugin. Use Mark to Republish when needed and check the resulting export. Edits made in Photos do not update Lightroom.
If publishing needs attention
- Permission denied: open System Settings → Privacy & Security → Automation and allow Lightroom Classic to control Photos. Then use Library → Plug-in Extras → LR to Photos: Fix Photos Permission.
- Stuck queue: first confirm no publish is running. Then use Library → Plug-in Extras → LR to Photos: Clear Stuck Publish Queue and retry a small batch.
- Wrong or missing album: check the destination preview and open library. Choose a normal album destination, not a Photos Smart Album.
- Missing only on iPhone: if the image exists in Photos on Mac, follow the iCloud checks.
If it still fails, email support with your macOS, Lightroom Classic and plugin versions, the exact error, and the step that failed.