Why choose LR to Photos for this?
LR to Photos is built for this exact job: keep editing in Lightroom Classic, then enjoy and share your chosen finished pictures in the normal Photos app on your iPhone.
- Publish instead of handling files. Combine the export, import and album destination in one action, without finding an export folder or importing each new batch by hand.
- Keep your selection organised. Use a named published collection for a holiday, family favourites or a small portfolio, with a matching album in Apple Photos.
- Make it part of your editing routine. Add your next finished pictures to the same collection and click Publish. Publish later edits from there too; the updated-edits guide explains how the new and older copies are handled.
The route is Lightroom Classic → Apple Photos on your Mac → Photos on your iPhone. The plugin handles publishing into Photos on Mac; iCloud Photos handles delivery to your phone.
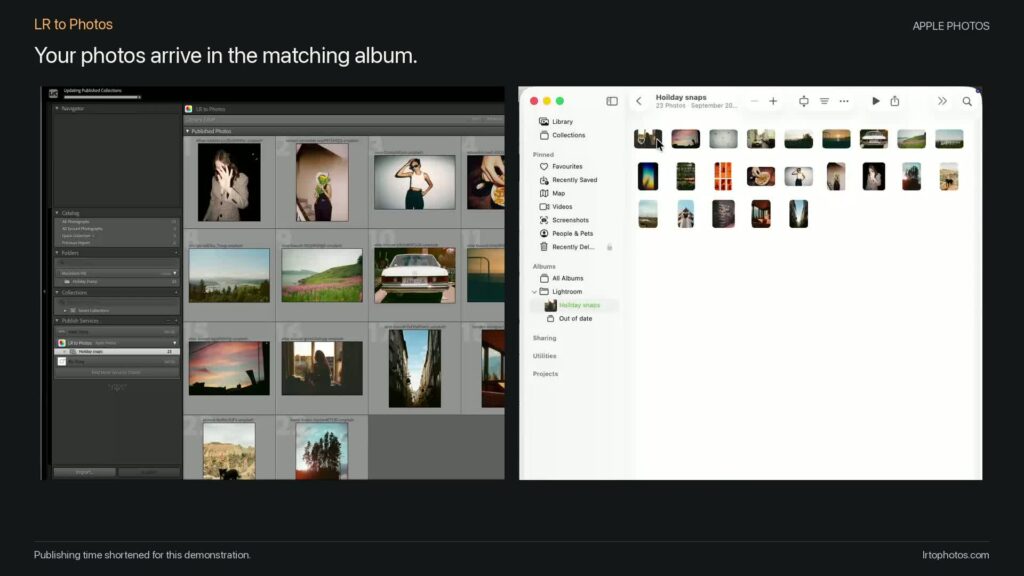
Watch the short demo below to see a Lightroom Classic collection published into its matching Apple Photos album.
What do I need to set up?
Use Lightroom Classic and Apple Photos on your Mac, with iCloud Photos enabled on the Mac and iPhone under the same Apple Account. On the Mac, the receiving library needs to be your System Photo Library. If your Mac Photos pictures already appear on your phone, you may already have this part set up.
On Mac, check Photos → Settings → iCloud → iCloud Photos. On iPhone, check Settings → your Apple Account → iCloud → Photos → Sync this iPhone. iCloud Photos applies to the library as a whole, including the album you publish into. Apple’s setup guide covers both devices.
In Photos’ General settings, keep Copy items to the Photos library enabled so Photos stores the published files. LR to Photos needs macOS permission for Lightroom to control Photos; it does not ask for your Apple Account password. Follow the installation and connection guide for the initial plugin setup.
How do I send my first photos?
- In Lightroom Classic’s Library module, open the LR to Photos service under Publish Services.
- In its settings, enable Use Album and choose Use collection name as album. JPEG and sRGB are useful starting points for sharing.
- Control-click the service, choose Create Published Collection…, and give it a recognisable name such as Phone favourites.
- Add a few finished photos to that published collection and click Publish.
- Open the matching album in Photos on your Mac to check the result, then find that album in Photos on your iPhone after iCloud has synced.
For the next batch, add more photos to the collection and click Publish again. If you prefer a rule to handpicking, you can collect your five-star photos instead.
If an image is in Photos on your Mac but has not reached your phone, follow the iCloud Photos checks. Delivery time depends on the upload and your connection.
Can I do this without a plugin?
Yes. For a one-off batch, export JPEGs from Lightroom Classic, import them into Photos on your Mac and put them in an album. iCloud Photos brings those copies to your iPhone. The free manual walkthrough covers the steps.
For a workflow you will use regularly, we recommend LR to Photos. Set up your collection and album destination once, then use Publish for each new batch. That removes the separate export-folder, import and album-handling steps from your routine. Get LR to Photos, or compare the methods in detail.
What happens to my originals and later edits?
Your original files stay in their existing location. Photos receives separate copies showing the Lightroom edits. Start with a small collection to check the result.
When you change an edit in Classic, publish it again to send a fresh version. Older Photos copies can remain; the guide to later edits explains how to review them. This is one-way publishing: editing the Photos copy does not update Classic.
How do I share them from my iPhone?
Open your album in Photos, select an image and use the Share button. You can also choose the image from the photo picker in apps such as Instagram or WhatsApp, with the app’s photo access enabled.
You did the editing. Now put those pictures where you will actually see and share them. With LR to Photos, publishing your favourites can be the last step in your Lightroom routine.
One payment including UK VAT, before currency conversion. See the setup steps.